Monday, October 25, 2010

Tuna Steaks with Ginger-Black Pepper Sauce

Recipe: Tuna Steaks with Ginger-Black Pepper Sauce
Page: 206
Date Cooked: October 15, 2010

I am a large fan of tuna steaks. It is a great alternative to other seafood and also has the potential to appeal to red meat eating patrons. I also appreciate that tuna can be cooked very rare and accepts flavors well. And all of these aspects of tuna are accomplished in Waxman's "Tuna Steaks with Ginger-Black Pepper Sauce."

Ingredients: Limes, sesame oil, rice wine vinegar, soy sauce, fresh ginger, coriander seeds, tuna steaks, cilantro, red bell peppers, chiles, unsalted butter, black peppercorns, olive oil 
The first step is to create the marinade for the tuna steaks. Half of the lime juice, sesame oil, vinegar, soy sauce, fresh grated ginger, and coriander seeds are all whisked together. The marinade is poured over the tuna steaks with a few cilantro springs. The tuna is then marinated at room temperature for about 30 minutes.

Tuna steaks in marinade with cilantro sprigs
While the tuna marinated, it is on to coring and stemming the peppers and chiles. Jonathan Waxman calls for the peppers to be cut into 1-x-2 inch triangles Honestly I'm not sure why exactly the peppers are cut in this manner. Initially I was under the impression it was a cooking technique but I am pretty sure it is a presentation thing. Nonetheless, I did my best to get those peppers into triangles.

Left: Cored and stemmed peppers and chiles
Right: Peppers and chiles cut into 1-x-2 inch triangles
The final component of the dish is the ginger-black pepper sauce. The peppercorns are added to butter until fragrant. In the meantime the tuna is removed from the marinade. The marinade is strained and added to the peppercorn pan, along with the rest of the lime juice. The sauce is then reduced.

The ginger-black peppercorn sauce being reduced
Now that all the components of the dish are prepared, it is on to cooking. The peppers and chiles are sautéed   in the olive oil for about 8 minutes, removed from the pan, and then covered to keep warm. In the same pan, the tuna is cooked until medium rare (a few minutes on each side). 


Pan-seared tuna until medium-rare
Simultaneously, the sauce is reheated, brought off the heat, and butter and ginger are whisked into the mixture. Now on to the final product...

Tuna Steaks with Ginger-Black Peppercorn Sauce
This dish was flavorful and tasty. The sauce had such a punch of ginger and pepper and complimented the tuna steak perfectly. Moreover, the tuna steaks were cooked to medium-rare, so you could enjoy the seared outside and yet enjoy the texture of the tuna steak. My one critique of the dish was that I had a lot of the peppers and chiles left over. Overall, I think this dish has an elegance to it and can be quite impressive when served.

Enjoy!

Saturday, October 23, 2010

Butternut Squash and Jonathan Apple Soup

Recipe: Butternut Squash and Jonathan Apple Soup
Page: 60
Date Cooked: October 15, 2010

“The true test of any cook is his or her ability to make a simple soup.” Jonathan Waxman opens with this line in the soup section of “A Great American Cook,” and his words are no secret in the culinary world. The one thing I do know about soup is that if done correctly the flavors have the punch of an entire entrée. 

Here in Pennsylvania it is apple season and it seemed only appropriate that I try to make as many recipes as possible that require this ingredient. While the recipe speaks highly of the Jonathan apple (a variety I had never heard of), I could not seem to locate it and used McIntosh apples instead (the recipe calls for Jonathan, McIntosh, or Jonagold apples).

Ingredients: Butternut squash, unsalted butter, kosher salt, McIntosh apples, white onion, garlic, black pepper, apple cider
The squash was cut, the seeds were scooped out, and it was then dotted with some butter to roast in the oven. About half-way through the squash roasting time, the apples were placed into the same pan till both the squash and apples were tender. The smell of butternut squash, apples, and butter roasting in the oven were amazing – it definitely felt like fall in my house.

Roasted squash and apples
While the squash and apples cooled, I went on to slice the onions and smash the garlic. The onions and garlic were sautéed with some butter, salt, and pepper for approximately 15 minutes. As the onion mixture sautéed, the squash and apples were chopped coarsely.

Left: Sautéed onions and garlic
Right: Chopped squash and apples
The squash, apples, apple cider, and water were added to the onion mixture. Everything was brought to a boil and then left to simmer for 20 minutes.

The soup simmering
After simmering, I placed batches of the soup into the blender to puree – while also adding some extra salt and pepper. The soup is then ready for consumption!

Butternut Squash and Jonathan Apple Soup
My initial take on Butternut Squash and Jonathan Apple Soup was that it was sweet. I think part of this had to do with the apples (those apples were delicious!) and the other side is that I didn’t add enough salt and pepper. Nonetheless, I thought the soup was great. The richness and smoothness was spot on and the flavor was perfect. Moreover, for a soup, this took relatively little time and effort. There is little to no doubt that I would make this again!

Enjoy!

Sunday, October 17, 2010

Steamed Artichokes with Garlic Mayonnaise

Recipe: Steamed Artichokes with Garlic Mayonnaise
Page: 251
Date Cooked: October 5, 2010

When I started this project I realized that the task was daunting - cooking every recipe takes time and dedication. However, the one thing that put me at ease was the vegetable recipe section in "A Great American Cook," where the directions are short and sweet.

This vegetable section recipe included steaming artichokes and making my own mayonnaise - both firsts for me.

Ingredients: Artichokes, lemon, flat-leaf parsley, olive oil, egg yolks, sea salt, garlic
The only time I eat artichokes are when someone else prepares them. And I do enjoy them. While I have bought artichokes from the store on numerous occasions, they tend to stay in my fridge until I throw them out. All because I never really knew what to do with a whole artichoke and was somewhat intimidated to prepare them. However, I can safely say that after this recipe I no longer feel that way!

To steam artichokes was just so simple and I'm somewhat disappointed no one informed me of this sooner. I cut about one inch from the top of the artichoke, trimmed down each leaf, and then cut the stems so they would stay upright in the steamer basket. They were then placed into a pot to steam for about 40 minutes.

Artichokes ready to be steamed.

While the artichokes steamed, I began making the mayonnaise. The juice of the lemon, chopped parsley leaves, egg yolks, and salt were all combined into a bowl and then whisked for 3 minutes.

Left: Lemon juice, parsley, egg yolks, and salt
Right: Components after being whisked for 3 minutes
Then came the difficult part of the mayonnaise making process: adding the olive oil. The olive oil is initially added a few drops at a time till the sauce emulsifies. It is then carefully drizzled at a slow pace to avoid curdling. The garlic is then added to the sauce.

Simultaneous whisking and olive oil drizzling. 
I thought I had the followed the directions just as they had been laid out in the recipe. Unfortunately, my mayonnaise never did look like mayonnaise. It did thicken, but it never had the light and fluffy texture that I wanted.

Garlic Mayonnaise

Though the mayonnaise didn't have the right consistency, I did end up with perfectly steamed artichokes and used the "mayonnaise" for dipping. Despite the incorrect texture, the mayonnaise mixture was delicious! It also went perfectly with the artichokes. The sauce gave the perfect amount of acidity one would want with steamed artichokes. Furthermore, the lemon juice, parsley, and garlic produced an amazing flavor.

All in all, I decided I have to give mayonnaise making another try (and luckily for me, this isn't the only time Jonathan Waxman calls for making mayonnaise). Again in spite of not producing a perfect mayonnaise - it still turned out to be a tasty dish. And, hey, I'm not afraid of preparing artichokes anymore!

Enjoy!

Thursday, September 30, 2010

Pasta With Asparagus

Recipe: Pasta with Asparagus
Page: 128
Date Cooked: September 21, 2010

Pasta dishes are my go-to's when I'm in the mood for something quick, filling, and tasty. Not only do you get an architectural pasta shape feeling in your mouth but also an assortment of flavors. With that in mind, I decided to give Jonathan Waxman's "Pasta with Asparagus" a try.

Ingredients: Asparagus, cherry tomatoes, garlic cloves, basil leaves, olive oil, salt, pepper, bread crumbs, orecchiette, unsalted butter, and Fontina cheese

People have a tendency to overcook asparagus and Jonathan Waxman warns you of that as well. "The spears should be cooked just right, not too crunchy or too limp." Furthermore, many people shy away from asparagus because they think it's bitter - much of this has to do with how one cooks asparagus. Accordingly, the asparagus were trimmed at the part where the bitterness ends (the natural snapping point) and cut into 1/2-inch pieces. The tomatoes were then halved. Garlic was minced. And finally, the basil was julienned.

In the bowls: Halved cherry tomatoes and 1/2-inch pieces of asparagus
On the cutting board: Julienned basil and minced garlic
The one thing I really appreciate while preparing food is the contrasting colors of all the ingredients. The red of the cherry tomatoes in contrast with the green of the asparagus and basil is just pleasing to the eye.

The best part of this recipe is this is pretty much the end of any kind of real prep work (I had to grate the Fontina on my own, because I couldn't find it already grated). The rest is just cooking. The olive oil is heated in a large skillet and the garlic is sautéed. Add the tomatoes and the asparagus and cook till the asparagus is just tender (approximately 8-10 minutes). The mixture is then seasoned with salt and pepper, removed from the heat, and covered.

The sauntered mixture of garlic, tomatoes, and asparagus
The pasta is then cooked to al dente based on the package instructions. While the pasta is cooking, bread crumbs are placed on a baking sheet and toasted in the oven. Word to the wise: don't forget about the bread crumbs in the oven. I hate to admit it, but I burned the first batch and had to do it a second time. Also once the pasta has cooked, Jonathan Waxman suggests keeping about 1 cup of the pasta cooking water.

Drained pasta with reserved cooking water
And now putting everything together. The asparagus mixture is reheated over low heat and the butter is added. The orecchiette was added by spoonful and tossed. I never had to use the reserved cooking water, which is there just in case the pasta appears dry. The basil, cheese, and bread crumbs are added one at a time and tossed after each addition. Then it's all done.

Pasta with Asparagus

The pasta was good but to be honest I wasn't wowed by the flavor combination. Tomatoes, asparagus, basil, and garlic in a pasta is quite ordinary - but I enjoyed it nonetheless. Fontina cheese is not a cheese I pick up often and I really enjoyed the nutty-type flavor of the cheese. The one component that didn't see to resonate with me were the breadcrumbs. I assumed it would provide an added texture, but it just didn't do it for me. All in all it was good and the flavors were fresh.

Enjoy!

Monday, September 20, 2010

Pork Shoulder with Mole Sauce

Recipe: Pork Shoulder with Mole Sauce
Page: 183
Date Cooked: September 19, 2010

I delved into this recipe slightly uncertain. I had never used chocolate in a savory recipe, had never made a mole, and wasn't all to familiar with cooking pork shoulder. Furthermore, the recipe seemed to be quite complex and time consuming. But at the end of it all, I was pleasantly surprised and the smell of the stew was intoxicating from beginning to end.

Ingredients: Boneless pork shoulder, garlic cloves, cilantro, sake, dried pasilla chiles, serrano chiles, habanero chiles, onions, bacon, tomatoes, unsalted butter, chicken broth, basmati rice, salt, pepper, unsweetened chocolate, and all-purpose flour.

I think the moment you realize a dish requires more than one day to make, it begins to feel burdensome. Luckily, Jonathan Waxman's pork shoulder marinade wasn't much of a fuss at all - garlic, cilantro stems, and sake were the components of the marinade. Also, the pork shoulder was cut into 1-inch cubes. He suggests marinating it for at least 8 hours and I ended up marinating it for almost a full 24 hours.

Pork shoulder with marinade
The next day it was all about making the stew. The recipe calls for three different kinds of chiles - pasilla, serrano, and habanero. The pasilla chiles start off in dried form and are placed in warm water to bring them back to life. Prep for the serrano and habanero chiles was familiar - the same blackened and blistered steps utilized in the Warm Lobster Tacos with Guacamole recipe. However, these chiles were smaller and a bit harder to seed. All the chiles were finely chopped and mixed together.

Pasilla chiles being soaked. Habanero and serrano chiles blackened and blistered.
Then it was on to the chopping - the onions, the garlic, the tomatoes, and the bacon. The recipe calls for either a large enameled cast-iron casserole or Dutch oven. Luckily for me, my roommate invested in a Dutch oven a few weeks back and I was able to put it to use (Thanks Cari!). The bacon is cooked for a few minutes to render some of its fat and then the other chopped components as well as half of the chiles are added and sautéed. Once complete, the bacon-vegetable mixture is removed and the pot is wiped out. I would like to mention that the smells were already amazing at this point.

Left: Bacon with some of its fat rendered and chopped components
Middle: All the components before being sautéed
Right: After being sautéed  
The pork shoulder was now ready to leave the marinade (the marinade is reserved for later in the recipe) and be browned using butter in the pot over medium-high heat. The delicious smell of pork just continued to waft in my home. I also hate to admit that I was tempted to not finish the recipe and eat the browned pork and the bacon-vegetable mixture on their own.

Beginning to brown the pork shoulder 

Once all the pork has been browned and removed from the pot. The strained marinade and chicken broth are used to deglaze the pot and scrape up any browned bits. The pork and the bacon-vegetable mixture are now placed back into the pot and brought to a boil. The heat is then reduced to a simmer, the pot is covered, and the stew now cooks for approximately 2 hours.

Marinade and chicken broth in pot with bacon-vegetable mixture and browned pork shoulder.

Approximately 20 minutes before the stew is complete, the recipe instructs you to begin preparing the basmati rice. Jonathan Waxman calls for the rice to be cooked with some butter as well as salt and pepper to taste. Just in case I forget to mention it later - the rice was delicious! But what isn't delicious when you add butter?

In order to finish the stew and I suppose in order to really call it a mole, it was now time to use the chocolate. The chocolate was chopped and set aside. While, the flour and butter were mixed together with the remaining half of the chiles. The flour mixture was whisked into the stew and the chocolate was added. The moment the chocolate was introduced into the stew - the color changed to a deep brown (chocolate brown, actually).

This picture highlight the color change once the chocolate is added to the stew.
The pork shoulder with mole sauce was almost complete - another 10 minutes on high heat with constant stirring. The cooked rice was then placed into bowls, topped with stew, garnished with cilantro, and ready for consumption.

Pork Shoulder with Mole Sauce
The adjective "rich" is the best word to describe Jonathan Waxman's Pork Shoulder with Mole Sauce. The first bite was interesting. I wasn't ready for the flavor and unsure of what to expect. I tasted a richness - a mixture of dark chocolate and pork. I went in for the second bite, this time picking up bits of the browned bacon and again thinking about how rich the dish was. After the third bite I was convinced...it was delicious!

The pork was cooked perfectly, it melted in your mouth. The rice helped cut the richness of the mole sauce and provided a well needed texture contrast. The things I couldn't taste and really wanted to taste were the garlic, the onions, and the tomatoes. The smell of those ingredients had taunted me while cooking and their flavors seemed to get lost in the richness of the mole sauce. Moreover, I didn't get the full impact of the heat of the three different kinds of chiles required for this dish. Granted, I personally am a fan of spicy and therefore wanted a little more of a kick.

All in all, Jonathan Waxman's Pork Shoulder with Mole Sauce was rich and delicious. The recipe appeared to be painstakingly tedious, but actually was not too bad. It's a recipe that I plan on keeping in my repertoire.

Enjoy!

Note: The ingredients for the recipe were halved.

Thursday, September 9, 2010

Pismo Beach Clam Ragout

Recipe: Pismo Beach Clam Ragout
Page: 229
Date Cooked: September 8, 2010

I may get ahead of myself here and give away the punch-line, but the thing is Jonathan Waxman's Pismo Beach Clam Ragout is simple, quick, and delicious. I was in one of those moods where I wanted to cook but really didn't want an entire production. Also, with Labor Day behind us I knew summer was coming to a close and I needed to relish in its flavors just a little longer.

Ingredients: Littleneck clams, corn, onions, butter, salt, pepper, dry white wine.
Prep was a cinch. Shuck the corn and get the kernels off the cob. Slice the onions into rings. And wash the clams. The great thing about clams (as part of the shellfish category) is that they are so easy to make and don't require much skill to handle - it's almost hard to mess it up. But remember, if you're getting them at the grocery store, don't tie the bag - they will end up dying and you really can't eat them afterward.

The three main components: corn, onions, and clams
The cooking portion of the recipe was even simpler than the prep. Saute the onions and corn with butter, seasoning with salt and pepper. Then the clams and white wine are added. The pan is covered and it all cooks together until the clams are open. The finished product:

Pismo Beach Clam Ragout
I believe this recipe rings true to the fact that simple can be oh so delicious. Basic seasoning and ingredients can just enhance a seasonal product. The corn was delicious and you really can't go wrong with white wine and clams. The best part: it all cooks in one pan! There just happens to be an aspect of grace in the simplicity of this recipe. Nothing groundbreaking, but yummy.

Enjoy!

Note: The ingredients have been halved.

Tuesday, September 7, 2010

Warm Lobster Tacos With Guacamole

Recipe: Warm Lobster Tacos With Guacamole
Page: 231
Date Cooked: Monday, August 6, 2010

From my initial skim of "A Great American Cook," it was obvious from the get-go that Jonathan Waxman has an affinity for lobster, chilies, and guacamole. So it came with little surprise that he combined those three items to come up with this recipe.

Ingredients: Live lobsters, onions, tomatoes, shallots, jalapeno chilies, cilantro, poblano chilies, avocados, lime, sea salt, corn tortillas, and olive oil

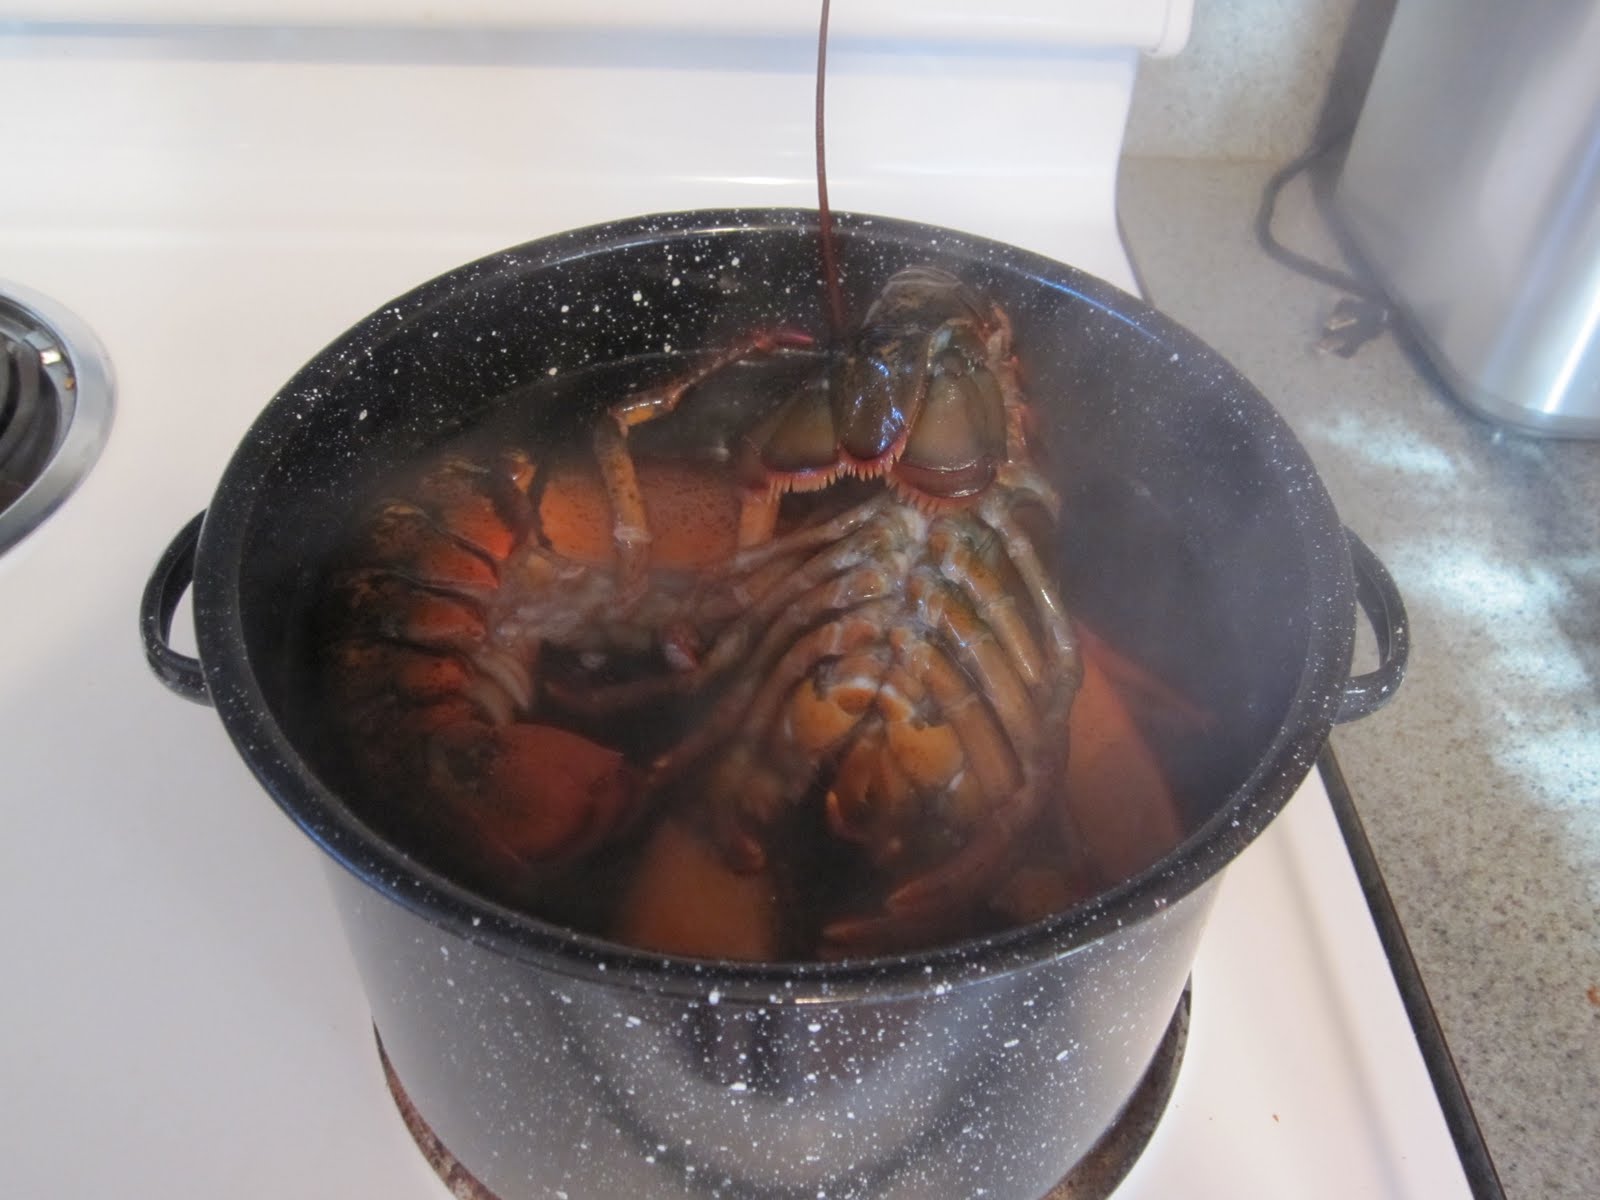
I think any recipe that calls for something to be alive can come with some trepidation. The trick with lobster though is put it in the freezer long enough for them to be slow (but of course not dead) and then when the water is boiling drop them in. This was the right method for me. It minimizes any thrashing or boiling water spillage.

Two medium sized Maine lobsters

The rest of the recipe called for lots of chopping. However, while you chop, a reduction of onion, lobster shells, and two cups of the lobster cooking water are placed on the stove, allowing you to use your time somewhat wisely.

The components of the reduction
Jonathan Waxman instructs you to blacken and blister some poblano and jalapeno chilies. I hadn't used this technique before and was intrigued by what would come of this. Once the chilies have achieved a blackened and blistered state, they are steamed in their own heat. The next part was the most interesting. You peel the skin by hand, stem, seed, and then cut into strips.

Process of blackening, blistering, steaming, peeling, stemming, and seeding the chilies
While the chilies and the tomato salsa (more on that later) appeared to be a bit of a tedious process, the guacamole was quite simple - avocados, salt to taste, cilantro, and lime. Now remember that lobster broth reduction we have going, well here is where that comes in. In a large bowl, tomatoes, shallots, jalapenos, and cilantro have been chopped, mixed, and tossed. Almost a quarter of the reduced lobster broth is then added to the tomato mixture. The tortillas were then placed in the oven to warm. And finally, the strips of chilies and lobster meat are heated over the stove with some olive oil.

Guacamole, tomato salsa, and lobster meat with chilies
Our three main components are now ready for taco assembly and here is the final product:
Warm Lobster Taco with Guacamole.
The verdict....

The warm lobster tacos with guacamole were good. However, they were not worth the effort. The one place I thought the recipe would really shine was the addition of the lobster broth reduction to the tomato salsa. Who doesn't love lobster? And then adding some more of that wonderful lobster flavor to the salsa. Well, that should really make it sing. Unfortunately, I found reducing the lobster broth and adding it to the tomato salsa was a waste of time and effort. It added no extra dimension that couldn't be found in the lobster meat itself. There was also a large amount of tomato salsa left over after assembly, making me think the proportions were slightly off.

The blackening and blistering of the chilies - while that wasn't the most time consuming aspect of the dish it seemed somewhat frivolous. Granted the heat from the chilies provided a nice kick to the tacos in general. I think it could have been achieved by simply dicing them all into the tomato salsa.

The star of it all was the lobster. But that didn't have much to do with the recipe itself than it did with the natural taste of a wonderful ingredient. All in all, the other components of the taco didn't do much to elevate the flavor of natural lobster.

Enjoy!

I would like to thank Nathan for allowing me to make a mess in his kitchen and use all his pots and pans.