Thursday, October 13, 2011

Potato Skins with Potato Salad

Recipe: Potato Skins with Potato Salad
Page: 26
Date Cooked: October 8, 2011

Given this project, I try to make a recipe whenever I can. So when I hosted a college football viewing party (GO GATORS!) I made sure to look through JW's A Great American Cook to find a good game day recipe and I think this was it. According to Waxman this is a take on "modern American food," so why not place it in the context of a modern American college football party.
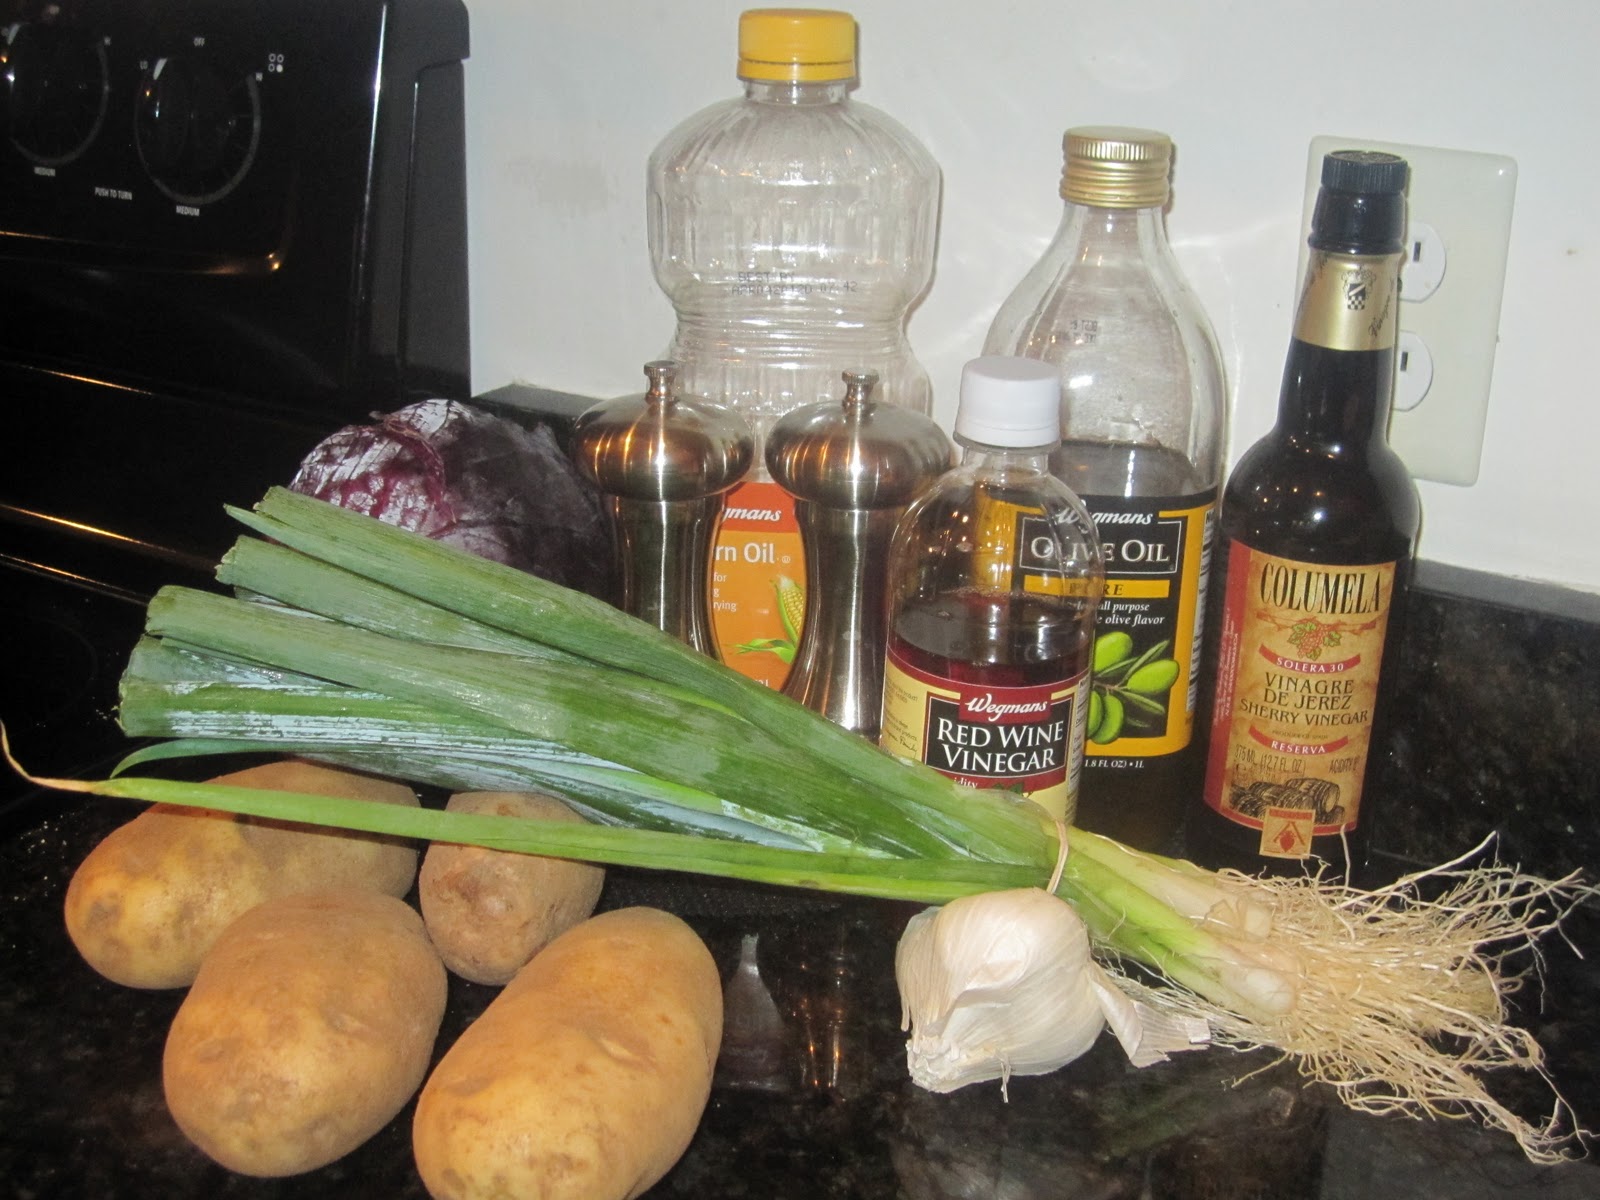
Ingredients: Russet potatoes, corn oil, salt, pepper, scallions, garlic, sherry vinegar, olive oil, red wine vinegar, and red cabbage

The first item of business was to roast the potatoes. I pricked them all over with a fork and placed them in the oven until tender. After the potatoes roasted and I let them cool for a bit, I cut them in half and scooped out the pulp.

Left: Roasted potatoes Right: Potato skins with pulp

I then tossed the potato skins in some corn oil, salt, and pepper. I placed them on a baking sheet and put them back in the oven until golden brown. While the potato skins baked, I minced the scallions and garlic and stirred them into the bowl of potatoes along with the sherry vinegar and olive oil.

1. Minced scallions 2. Minced garlic 3. Potato salad

Furthermore, I whisked the red wine and some olive oil together in a bowl and tossed in the shredded cabbage and seasoned with salt and pepper. I placed the cabbage on a platter and then stuffed the potato salad into the warm skins and put it on the plate.

Potato Skins with Potato Salad

I think when many people (including myself) think of potato skins, you assume cheese and bacon. Or an overall sense of heaviness. These potato skins were the complete opposite of that very idea. It was a light side dish that worked well. The potato salad was tart - probably from the sherry vinegar - but it yummy. It was light and had a lot of flavor. On to the potato skin itself.... I personally love the skin of a potato and always eat it. I think they were totally fine, nothing out of the ordinary. But JW's cooking times were spot on! The surprise component of the dish was the red cabbage coleslaw on the bottom. I thought it was soo flavorful. I ended up eating the extra just on its own.

Overall it was an OK dish. I wasn't disappointed nor was I overly enthusiastic. But it was good and tasty.

Enjoy!

Sunday, October 9, 2011

Roast Chicken and Scallion Sandwich with Warm Mayonnaise

Recipe: Roast Chicken and Scallion Sandwich with Warm Mayonnaise
Page: 108
Date Cooked: October 2, 2011

You know the feeling one gets after you cook a great meal and are incredibly satisfied? You begin to clean up,  realize you have an exorbitant amount of leftovers, and try to think of ways to use whatever is left. Well, one big reason why I like this recipe so much is that it gave me the opportunity to use my leftovers from the previous post.

Ingredients: lemon, scallions, olive oil, egg yolks, capers, salt, pepper, ciabatta, shredded meat from perfect roast chicken with mashed potatoes, and spinach, and chives

Since one major component (the roast chicken) of the sandwich is already taken care, the other component is the warm mayonnaise. Now I've made mayonnaise a number of times as I've cooked through this cookbook. However, the technique was very different this time around. It was the first time, JW called for the use of a double boiler. Accordingly, I put a few inches of water in a pan to simmer for a bit. I then whisked the lemon juice, egg yolks, and some olive oil together into another pan. I set the smaller pan on top of the larger pan and continued to whisk as I slowly added olive oil. I continued doing this just until I got a soft, fluffy mayonnaise. Afterward, I removed the pan from the heat, stirred in the capers and chopped scallions, and seasoned with salt and pepper.

Process of making warm mayonnaise

I then split the ciabatta horizontally and placed it under the broiler to toast. In the meantime, I combined the chicken with the mayonnaise.

Left: Sliced ciabatta Right: Chicken mixed with scallion mayonnaise

Once the ciabatta was toasted, I spread the chicken mixture over the bread and sprinkled it with chives. Furthermore, I followed Jonathan Waxman's suggestion to serve it open faced.

Roast Chicken and Scallion Sandwich with Warm Mayonnaise

This sandwich was a perfect way to use up some leftover roasted chicken. But the difficult part is that I can't decide what component made the sandwich so good. First off, I loved the roast chicken from the previous recipe. Secondly, this mayonnaise recipe was really great. It had the perfect amount of acidity. Also, the scallions and capers really gave it a great texture. Since I can't decide between the two, I have to conclude it was the combination.

All in all, I highly recommend the sandwich. It wasn't chicken salad. It wasn't just mayonnaise with chicken. It was a "Roast Chicken and Scallion Sandwich with Warm Mayonnaise."

Enjoy!

Wednesday, October 5, 2011

Perfect Roast Chicken with Mashed Potatoes and Spinach

Recipe: Perfect Roast Chicken with Mashed Potatoes and Spinach
Page: 148
Date Cooked: September 30, 2011

"Roast chicken is the cornerstone of the basic recipes, but it holds its own against any complicated, expensive dish. It's a universal standard." - Jonathan Waxman. That quote really says it all. The recipe is basic, yet holds its own. I had never roasted a whole chicken prior to this recipe. I've been somewhat intimidated by the idea of buying a whole bird (other than during Thanksgiving) and roasting it for myself. However, I was quite happy with the results.

Free-range/corn-fed/naturally raised chicken, salt, pepper, olive oil, yellow Finn potatoes, garlic, butter, and spinach

Well the recipe is called "Perfect Roast Chicken," so I started with the chicken. I removed the gizzards and any extra fat, rinsed the chicken, patted it dry, and then salted, peppered, and rubbed the chicken (inside and out) with olive oil. I placed the bird into a pan and put it in a hot oven to roast. Making sure to baste it ever 5 minutes.

The basting part was a bit tedious, and the oven was really hot! I didn't realize it till now but the intro to the recipe warns of this. JW advises you to wear long oven mitts and to use a large soup spoon rather than a plastic baster. I didn't have a plastic baster and did indeed use a large soup spoon and it worked just fine.

Left: Chicken salted, peppered, and rubbed down with olive oil Right: Roasted chicken

While the chicken roasted I worked on the side dishes - the potatoes and the spinach. First, I scrubbed the potatoes and cut them into pieces. I put the potatoes along with water, garlic cloves, and salt into a large saucepan. The contents were brought to a boil and then remained on simmer until the potatoes were tender. Second, I drained the water from the saucepan but reserved the starchy potato cooking water. Third, I returned the potatoes and garlic to the pan and added butter, olive oil, and some of the potato water. Finally, I mashed the potatoes and salt and peppered to taste.

1. Potatoes, garlic, and salt 2. Potatoes and garlic with reserved potato cooking water 3. Mashed potatoes

After its stint in the oven, I removed the chicken and allowed it to rest for a few minutes. It was during these last few minutes that I focused on the spinach. I melted butter in a pan, added garlic cloves, and cooked until brown. I discarded the garlic, added the spinach, and cooked until wilted (really just a few minutes).

Left: Browning the garlic Right: Cooking the spinach

The only thing left to do was to carve the chicken and plate....

Perfect Roast Chicken with Mashed Potatoes and Spinach

I say this from time to time and find it necessary to say it once again. I didn't grow up with the all-around typical American meal, a good reason for why I chose this particular cookbook. Having said that, this felt like an "American" meal. Perhaps it was the simplicity of the ingredients or the typical sides - mashed potatoes and spinach.

I made this on a really cold and rainy night here in Central PA and it worked perfectly for that occasion. I was really happy with the meal. Nothing was out there or really all that new and different. It was comforting. Yet, I was super excited about the chicken. First off, no longer will a whole chicken scare me ever again! Secondly, it was cooked perfectly. I really appreciate the simplicity of cooking an item in just salt, pepper, and olive oil/butter. You get to taste the ingredient at hand. The chicken was the main event of the plate and it tasted like it too.

Overall, it was a great recipe. I can see myself making this again. It required little effort but had a pretty big payoff.

Enjoy!

Sunday, October 2, 2011

Tuna Carpaccio

Recipe: Tuna Carpaccio
Page: 34
Date Cooked: September 28, 2011

So I've made one other carpaccio (Beef Carpaccio with Warm Potato Salad) from Jonathan Waxman's cookbook and was very much pleased. However, in no way would I compare this carpaccio to the other. While JW makes the claim that tuna has an "intrinsic beefy texture and almost meaty flavor" (a statement I agree with), at the end of the day the two products are very different.

Ingredients: Tuna, lime, olive oil, egg yolks, rice wine vinegar, whole-grain mustard, salt, pepper, cucumber, red bell pepper, yellow bell pepper, green bell pepper, and chives

As with any carpaccio, you want the freshest and most color appropriate piece of meat (or in this case, fish). In order to make slicing the tuna a bit easier, I placed the package in the freezer. After its stint in the freezer, I sliced the tuna into equal pieces and placed a single piece on lightly oiled parchment paper, and pounded it lightly. I followed suit with the remained pieces. I then placed the tuna, still in the parchment paper, in the fridge while I continued prepping the rest of the ingredients.

Left: Sliced tuna Right: Carpaccio-ed tuna in oiled parchment paper

Then it was on to making the mayonnaise. I juiced the lime and whisked it together with the rice wine vinegar, mustard, and egg yolks. I then slowly added the olive oil, while continuing to blend, until the mayonnaise emulsified. I continued to add the olive oil until the mixture was light and fluffy. Finally, I seasoned the mayo with some salt and pepper. The best part of course was that my mayonnaise accomplishment from last time was not a fluke! Yes...I did it again!

Left: Egg yolk mixture and olive oil Right: Mayonnaise

With the mayonnaise out of the way, I began slicing and dicing. I peeled the cucumber and cut it into a fine julienne and also diced the red, green, and yellow bell peppers.

Left: Julienned cucumber Right: Diced green, red, and yellow bell peppers

Finally, I was ready to plate. I tossed the cucumber strips in some of the mayonnaise and put it in the plate. I then took the tuna out of the fridge and placed it on top of the cucumber, placing a bit of the mayo on top of each slice of tuna. Lastly, I sprinkled the assortment of bell peppers along with some chopped chives on top.

Tuna Carpaccio

I couldn't get over how visually stimulating this dish was on the plate. When you look at it you realize nothing is the same color and it really is quite beautiful. Heck, I think my picture here rivals the one in the book itself. The best part....it tasted just as good as it looked. It was exquisitely light yet very filling. The freshness of the tuna rang throughout every bite. But the crunch from the bell peppers gave a perfect textural contrast. And the lime in the mayonnaise provided the perfect amount of acidity. Furthermore, the plate looks quite intricate, but is actually very simple.

I loved this dish and enjoyed every bite. JW makes note of replacing the cucumber for jicama in the winter time, and it looks like I may have to try that.

Enjoy!

Wednesday, September 28, 2011

Wilted Greens and Goat Cheese Sandwich

Recipe: Wilted Greens and Goat Cheese Sandwich
Page: 100
Date Cooked: September 27, 2011

I don't have much to compare this sandwich to and in this case it's a good thing. I thought the flavors were simply unique. Furthermore, I think it really is a sophisticated (JW's word choice) vegetarian sandwich.

Ingredients: sweet onion, garlic, olive oil, chopped greens, goat cheese, salt,  pepper, red pepper flakes, parsley, butter, and sourdough bread

The sandwich concept is really simple but I think it's the small touches of what to cook that makes it soo good. The first steps included slicing the onion (even though the recipe intro mentions minced onions) and mincing the garlic. I then heated some olive oil in a pan, sauteed the onions, added the garlic, and sauteed it a bit more. I then added the greens, until wilted and tender. The pan was then set aside to cool.

1. Sliced onions 2. Minced garlic 3. Sauteed onions, garlic, and greens

In the meantime, I mashed the goat cheese with a fork and added salt, pepper, and red chili flakes. I then stirred in the greens mixture and the parsley as well as additional salt and pepper to taste.

Wilted greens and goat cheese mixture

I lightly buttered the bread and spread the goat-cheese mixture onto the bread slices. I also melted some butter in a pan and then placed the sandwich (un-buttered side down) until the bread was golden brown.

Cooking the sandwiches

Once the sandwich was cooked on both sides, I removed it from the pan, cut it in half, and it was ready for consumption.

Wilted Greens and Goat Cheese Sandwich

Like I said, this was a sophisticated sandwich and I really enjoyed it. I enjoy vegetarian sandwiches, but often find them to be a little one note, however this was not at all. There was just the right amount of garlic. The parsley gave a great earthiness that goes so well with the goat cheese. I had some leftover goat cheese-greens mixture and made the same sandwich the next day, but without all the butter, and it was still just as good!  Overall, the sandwich was filling and overall yummy.

Enjoy!


Wednesday, September 21, 2011

Broiled Lobster with Zucchini and Chile Butter

Recipe: Broiled Lobster with Zucchini and Chile Butter
Page: 233
Date Cooked: September 19, 2011

Summer is coming to an end and I haven't cooked a single lobster. Well that is all about to change starting now!  I walked into my grocery store the other day and saw that the tank was full of these clawed crustaceans. It was at that moment I knew I had to take one home to eat. Furthermore, I had all this amazing zucchini in my fridge from the farmers market - so this really was the perfect recipe to make.

Ingredients: red jalapeno chile, unsalted butter, rosemary, salt, pepper, lemon, lobster (in styrofoam box), zucchini, and olive oil

While a large pot of salted water heated on the stove, I began prepping the chile butter.  I stemmed, seeded, and chopped the chile. I then pureed the chile with the butter in a food processor. I placed the butter into a small dish and added finely chopped rosemary, salt, pepper, and a touch of lemon juice.

Chile Butter

Once the pot of water came to a nice boil, I dropped the lobster into the pan, covered and let boil for just a few minutes. I removed the lobster and let it cool. I then split the cooled lobster in half and lightly cracked the claws. I want to make a note here. Immediately, I thought the best way to split a lobster in half was from the underside (which is what I did). However, when I did some looking afterward I discovered the best way to do it is from the top - slicing from the head down. Doing it the latter way results in a really neat looking presentation. Regardless, once I split the lobster in half, I rubbed the chile butter all over the lobster meat and placed it in the oven to broil.

1. Live lobster 2. Boiled lobster 3. Lobster with chile butter before being broiled

In the meantime, I heated some olive oil and sauteed zucchini rounds (seasoned with salt and pepper) in a pan until they were brown but still crispy.

Sauteed zucchini rounds

With all the components cooked and ready, I decided to plate. I placed the lobster in the middle of the plate and surrounded it with the zucchini.

Broiled Lobster with Zucchini and Chile Butter

Jonathan Waxman has only two lines for the introduction of this recipe and I would like to repeat them. "Here's an uncomplicated way to cook lobster. The spicy butter is spectacular with the lobster meat." These two sentences were my thoughts exactly! The lobster was delicious! And "oh my goodness" the chile butter was amazing! I had some foresight and expected the butter to taste pretty damn good, so I actually saved some of the butter to eat with the lobster. Best idea ever! What I also loved was that the zucchini paired perfectly. It obviously wasn't the star of the plate but it was a nice flavor and texture to have on the side.

The dish was just yummy. Thinking about it now makes me want more. Heck, I'm thinking of making the chile butter and keeping it on hand just for fun.

Enjoy!


Thursday, September 15, 2011

Succotash

Recipe: Succotash
Page: 249
Date Cooked: September 13, 2011

I have to say this upfront because it the first thing that comes to my find when I hear/read the word succotash. I immediately think of Daffy Duck from the Looney Tunes saying "suffering succotash." I'm not sure why succotash is oh so suffer-able, if you ask me...it was just super simple.

Ingredients: Corn, garlic, basil, salt, green beans, yellow wax beans, lima beans, sweet onions, tomatoes, olive oil, butter, and pepper

I think as you cook through an entire cookbook, you really get to know the chef behind the recipes. I've picked up on certain traits or techniques that I believe Jonathan Waxman stands behind. One of these happens to be vegetarian stock made from corncobs - which is done in this recipe and also in a previous recipe.

Accordingly, I husked the corn and cut the kernels off the cob. I placed the corncobs, garlic cloves, basil stems, water, and salt into a pot and allowed it to simmer for some time. Afterward, I strained the stock and brought the broth to a boil (trying saying the last part 3x real fast!).

Left: Making vegetable stock Right: Boiling strained broth

While the broth boiled, I topped and tailed the beans. Diced the onions and tomatoes. And also, smashed the garlic cloves. I also placed the beans into the broth, cooked till al dente, and removed them with a slotted spoon.

1. Diced onions 2. Diced tomatoes 3. Cooking beans in broth

I then pulled out the Dutch oven and heated some butter and olive oil over medium heat. I added corn, onions, garlic, and salt to the casserole and cooked for a few minutes. I then added the beans and cooked it for a bit longer. Finally, I added the tomatoes and basil and cooked just a bit longer.

Succotash in the Dutch oven - after added the tomatoes and basil

After all the vegetables had cooked to perfection (and JW makes a note in the recipe that "the only thing not to do is cook the vegetables until they fall apart), I was ready to plate. I spooned the succotash into a bowl and garnished it with a bit of basil.

Succotash

I've never made succotash before and quite honestly I didn't really know what it entailed. So I learned the following: it is a simple side dish that involves slow braising vegetables and traditionally includes corn and beans (oh and butter). In addition to taste, one thing I truly appreciate is the visual contrast a dish produces. JW's succotash hit the visual aspect right on the dot. It looked beautiful.

And it tasted good as well. I didn't have much of an "ah ha" moment in this recipe but I could see the value in the dish. However, if I made it again...I think I would add bacon. I missed that added dimension of fat and bacon really would have punched it up. All in all, it was an OK recipe. In closing, I suppose I have to say it... "Suffering Succotash!"

Enjoy!