Tuesday, August 30, 2011

Zucchini Blossom Beignets with Sun-Dried-Tomato Mayonnaise

Recipe: Zucchini Blossom Beignets with Sun-Dried-Tomato Mayonnaise
Page: 252
Date Cooked: August 20, 2011

When I first skimmed through JW's "A Great American Cook," I did some mental note taking of the recipes. This recipe in particular stood out to me because I had never seen zucchini blossoms in the grocery store. Accordingly, I have been on the lookout for them for almost a year. However, after doing some reading I found out that they are commonly found at farmer's markets in the summer time. Unfortunately, none of the vendors at my regular farmer's market seemed to carry them. One weekend, I tried out a market I hadn't been to before and there they were! I bought them and decided to make the recipe that very day.

Ingredients: Sun-dried tomatoes, lemon, corn oil, eggs, Balsamic vinegar, tarragon, salt, pepper, flour, lager, olive oil, and zucchini blossoms

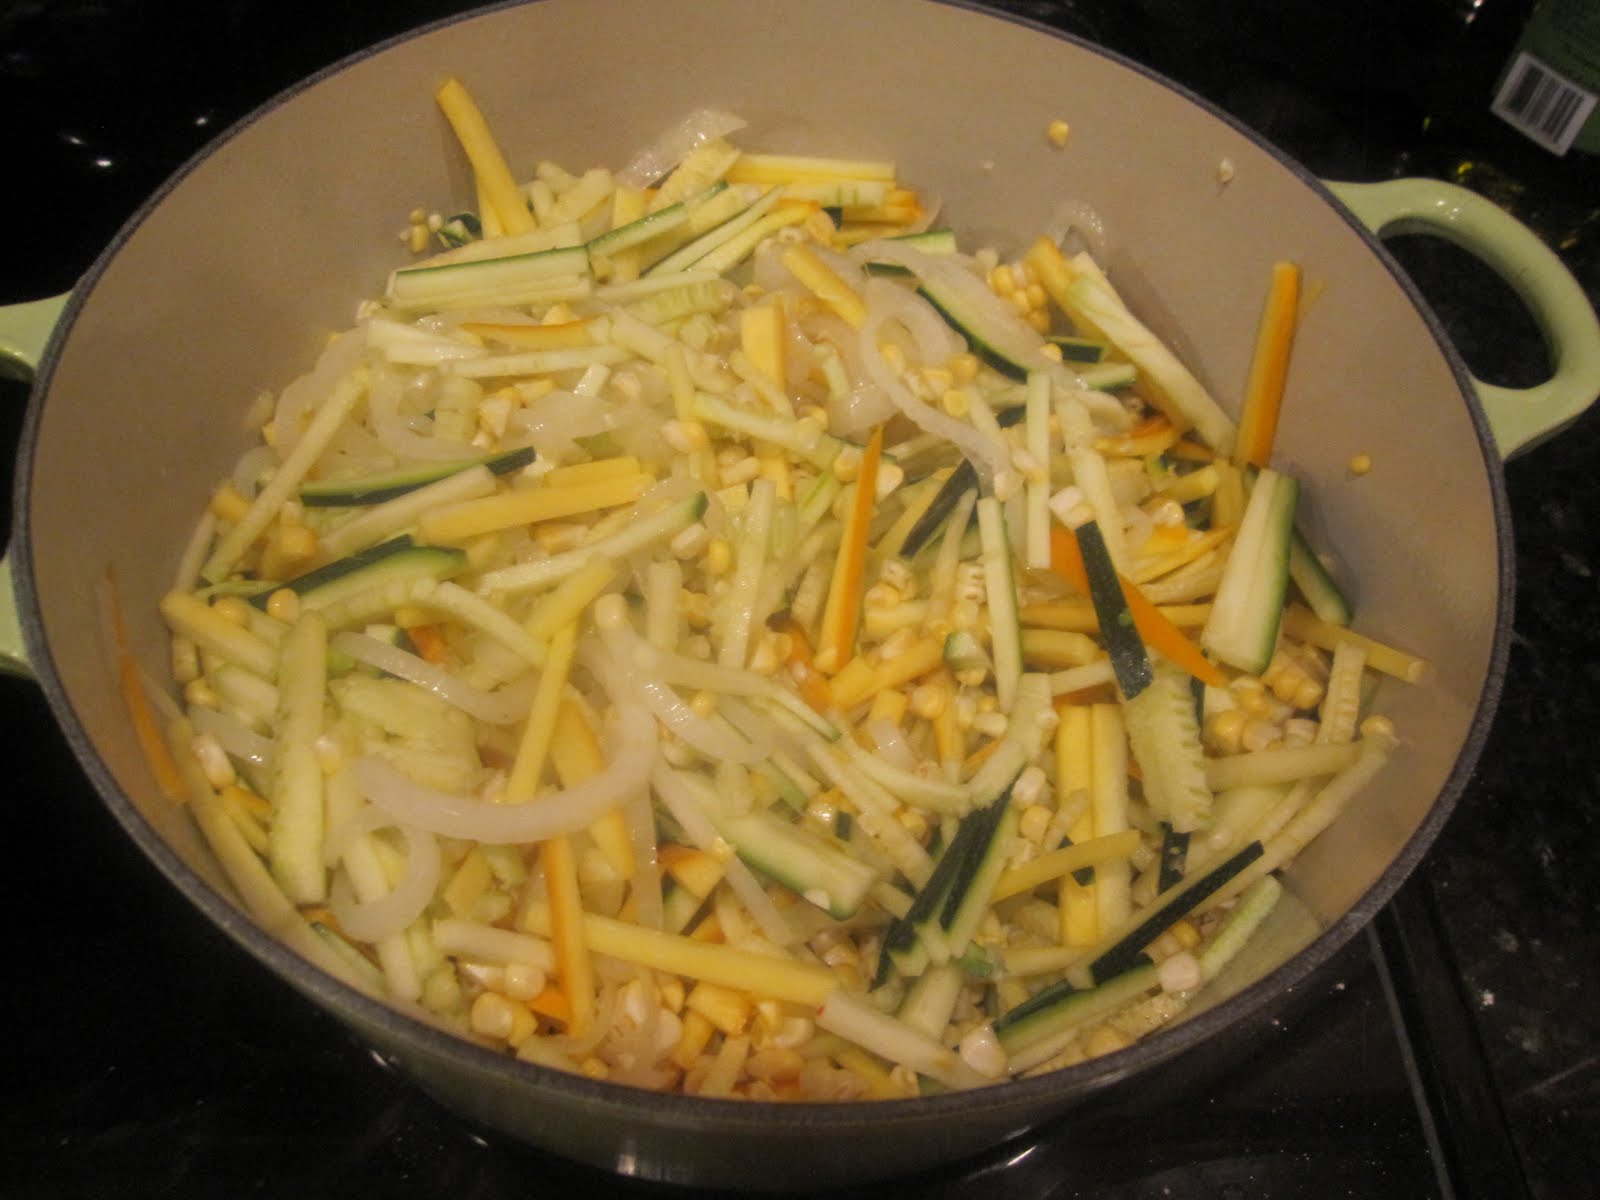
First, I placed the sun-dried tomatoes to soak in hot water for some time. While the sun-dried tomatoes soaked, I made the batter. I put flour into a bowl and created a well. I added egg yolks, beer, olive oil, salt and pepper into the well. The entire mixture was blended well and placed on the side to rest.

Making the batter

With the batter now resting, I proceed on to the make the mayonnaise. The prospect of sun-dried-tomato mayonnaise was indeed quite exciting, except of course for the mayonnaise part. However, I've continued to keep trying. I drained the tomatoes and placed them into a food processor to puree. Later, I added the egg yolks, Balsamic vinegar, and lemon juice to pulse. This time in the mayonnaise making process I used an immersion blender. I put all the contents of the food processor into a a bowl and slowly added the corn oil as I continued to blend. Well ladies and gentleman, this is the moment I have been waiting for since the very first time I made mayonnaise......I DID IT! I made mayonnaise that looked like mayonnaise! Not liquid-y at all! Perfect, could have come from a jar, good ol' mayonnaise! I'm not sure if you can tell...but it was quite exciting. I added the tarragon, few drops of balsamic, salt, and pepper to the mayonnaise; covered it and put it in the fridge.


Sun-Dried-Tomato Mayonnaise!


I then focused my attention on the zucchini blossoms. I opened each blossom carefully and removed the stamen. I closed the blossoms back up and put them in the fridge until I was going to fry.

Zucchini blossoms with removed stamens

I beated the egg whites until soft peaks formed and folded it into the batter. With the oil hot and ready in a pan, I dredged the zucchini blossoms through the batter and situated them into the hot oil until they were nicely browned. I used a slotted spoon to remove the blossom and allowed them to drain on some paper towels.

Frying up zucchini blossoms

Finally, I served the zucchini blossoms alongside the sun-dried-tomato mayonnaise.

Zucchini Blossom Beignets with Sun-Dried-Tomato Mayonnaise

I really felt that this was a bit of a treat. Not to mention, I was still running on the high of actually making mayonnaise. I did enjoy the beignets, but as light as the batter was, I thought it was too heavy for the delicate blossoms. When I later read the intro to this recipe, JW also suggests "[stuffing] the blossoms with finely minced zucchini with a few herbs and olive oil or a little chopped tomato mixed with a good soft goat cheese." And when I think about it, that suggestion could have been the trick to my feeling so torn. Moreover, in the past when I was served zucchini or squash blossoms, they are often stuffed with something. Regardless, it was still a beautiful summertime treat.

The sun-dried-tomato mayonnaise paired excellently with the zucchini blossoms. The mayonnaise provided additional salt and acidity. Speaking of the mayonnaise, I began wondering that perhaps I was so successful in producing mayonnaise this time around because the recipe called for corn oil rather than olive oil. My understanding is that corn oil has a larger unsaturated to saturated fat ratio than olive oil and perhaps this was the reason the mayonnaise thickened faster. Nonetheless, my theory on the mayonnaise will continue to develop as I continue to delve into these recipes.

Enjoy!

Sunday, August 28, 2011

Brined Pork Loin with Huckleberries or Blueberries

Recipe: Brined Pork Loin with Huckleberries or Blueberries
Page: 175
Date Cooked: August 19, 2011

The key word for this recipe was: brining. I personally was interested in what exactly brining did to the meat.  You hear about it many times, but what is the true difference between a brine and a marinade. Sorry the nerd in me is going to rant for the next few sentences. From what I gather a brine is simply salt water. Allowing meat to sit in a brine allows it to become more tender when cooked because the meat cells have absorbed a lot of water from the brine solution via osmosis. Furthermore, the salt in the brine denatures the meat proteins further preventing dehydration when cooked. All in all you end up with a tender and moist piece of meat.

Ingredients: Pork loin (not shown), salt, sugar, carrots, onions, garlic, shallots, ginger, leeks, celery, butter, bay leaves, Beaujolais Nouveau, small potatoes, pepper, blueberries, and red wine vinegar

The pork was placed in a brine overnight. To create the brine, I dissolved salt and sugar in boiling water. I put the pork in a dish and covered it with the brine, turning it a few times during the overnight process.

Pork loin in brine
The next day, I proceeded to prepare all the ingredients. I peeled the carrots, onions, garlic, shallots, and ginger; and cleaned the leeks. I cut the carrots, leeks, and celery into lengths and quartered the onions. During this time, I also removed the pork from the brine and placed it into a Dutch oven with butter and browned it on all sides.

Left: Veggie mise en place Right: Browning pork

After I removed the pork from the pan, I added the carrots, onions, shallots, ginger, and garlic and browned them all on sides. I then added the leeks, celery, bay leaves, pork, wine, and enough water to completely cover the meat. The contents were brought to a boil, the pan was covered and placed in the oven.

1. Browning carrots, onions, shallots, ginger, and garlic 2. Added the leeks, celery, and bay leaves
3. With the pork, wine, and water

After the meat was "fork tender," I removed the casserole from the oven and took out the pork and covered it on a plate. I then let the cooking liquid reduce down to a few cups. I emptied the contents of the pan, strained the liquid, and then placed it back into the pot along with the pork.

Pork with reduced braising liquid

While the braising liquid reduced I worked on the potatoes. I set them into a saucepan with some water and salt and brought it a boil. I drained the potatoes, placed them back in the saucepan, and mashed them. I added some butter, salt, and pepper and kept the potatoes warm.

Mashed potatoes

Finally, it was time to create the blueberry sauce. I put some blueberries and red wine vinegar into a pan and brought it to a boil until it thickened. I then added the reduced braising liquid along with the rest of the blueberries and allowed it to simmer for a bit.

Blueberry sauce

While the blueberry sauce simmered, I sliced the pork into thin slices and situated them onto the plate. Finally, I poured the berry sauce onto the pork and served it with the potatoes.

Brined Pork Loin with Blueberries

A big reason I selected this cookbook was because I don't really cook "American" food (at least in the way I define it). This meal felt very "American" to me. It was a traditional meal and was quite homey (maybe it was the mashed potatoes that did it). I enjoyed the dish very much. There is no doubt to me that the brining and braising amplified the pork's "flavor and richness." It was perfectly tender and I really loved the acidity and sweetness of the sauce. It made for a beautiful plate. The potatoes were a side, nothing too exciting there. But it made sense, the star on the plate was the pork and the sauce.

Enjoy!

Sunday, August 21, 2011

Sea Scallops on Sweet Onions

Recipe: Sea Scallops on Sweet Onions
Page: 225
Date Cooked: August 17, 2011

The title of this recipe says it all. It really is all about the scallops and the sweet onions. And Jonathan Waxman makes a point to remind me that "it's a crime to mess around too much with scallops."

Ingredients: Sea scallops, white wine, sweet onions, unsalted butter, salt, pepper, and parsley

I placed the white wine and small scrap of a scallop in a small saucepan to reduce for a few minutes. The recipe actually calls for the small muscle attached the scallop, but the scallops I bought didn't have the muscles attached. I then strained the liquid and placed it on a side.

Sea scallop-white wine reduction

While the white wine mixture reduced, I sliced the onions as thin as possible. I then melted some butter in a pan and placed the onions along with some salt and pepper to cook on a low heat for quite some time. They continued to cook until "the onions [were] creamy and luscious." Later, I added the reduced wine to the onions and kept it all warm.

Cooking the onions will they are "creamy and luscious"

I salt and peppered the scallops and melted some butter into a pan. I placed the scallops into the skillet ("without disturbing them") and let them brown on each side.

Browning the scallops

Once the scallops were cooked on both sides. I placed the onions on a plate, put the scallops on top, and sprinkled on some parsley.

Sea Scallops on Sweet Onions

Scallops happen to be one of my favorite forms (if not my favorite) of shellfish and this recipe reminded me why. The simplicity of a scallop cooked to perfection sings on my taste buds. I just really enjoy it. The sweet onions were perfect in bringing out the sweetness of the scallops as well. But considering the onions were just cooked in butter over low heat for a while, I'm not all that surprised that it tasted soo good. This dish was simplicity at its best and didn't require much of a hassle. I really enjoyed it.

Enjoy!

Friday, August 19, 2011

Three-Tomato Salad, Version 2

Recipe: Three-Tomato Salad, Version 2
Page: 74
Date Cooked: August 7, 2011

The summer tomatoes have looked wonderful at the store and I couldn't help but buy some. I later remembered that there was another version of JW's three-tomato salad that I made earlier and figured why not get another recipe down. The last salad recipe really celebrated the pure taste of a tomato and so I had high hopes for this one as well.

Ingredients: Red tomato, yellow tomato, orange tomato, small tiny assorted tomatoes, green basil, red wine vinegar, salt, pepper, and olive oil

The first step was to slice the large tomatoes and place them alternatively on a plate. I then cut the small tomatoes in half and julienned the basil. Note: the recipe actually calls for red or purple basil as well. I couldn't find any so I used additional green basil. 


1. Tomato slices 2. Halved small tomatoes 3. Julienned green basil


I then placed the basil into a bowl with the red wine vinegar, salt, pepper, and olive oil. I drizzled some of the vinaigrette on the sliced tomatoes and then tossed the small tomatoes into the bowl of vinaigrette. Finally, I placed the small tomatoes on the plate and garnished it all with some pepper and basil.

Three-Tomato Salad Version 2

I thought the salad was delicious. Overall, I can say that the salad recipes in this cookbook have more or less turned out to be quite delicious. The tomato salad stayed true to the taste of the tomatoes. The vinaigrette, pepper, and basil just highlighted those flavors. All in all it is a simple, beautiful, and tasty salad. The presentation is also quite impressive. It's one of those great summer salads that would be nice to serve to guests.

Enjoy!

Wednesday, August 17, 2011

Fettuccine with Calamari and Summer Squash

Recipe: Fettuccine with Calamari and Summer Squash
Page: 135
Date Cooked: August 6, 2011

I came off of a high with the last seafood pasta dish and figured I would just keep going. Furthermore, I fell in love with my pasta maker and decided that instead of using dried fettuccine (like the recipe calls for) I would just go ahead and make it on my own. This pasta dish promises the taste of summer with summer squash and sweet onions - so I was excited to give it a shot.

Ingredients: Sweet onions, corn, zucchini, yellow squash, squid, olive oil, rice wine vinegar, thyme leaves, salt, pepper, spinach fettuccine, and red pepper fettuccine

The first step was to get everything in its place. I thinly sliced the onions, took the kernels off the corn, julienned the zucchini and squash, and cut the squid into rings.

Left: Corn kernels, sliced onions, and julienned squash and zucchini
Right: Squid rings

I heated some oil in a large skillet and sauteed the onions for a few minutes. Later, I added the zucchini, squash, and corn and sauteed all of it together. Finally, I added the vinegar and thyme and stirred it all together.

Sauteed onions, zucchini, squash, and corn

I then removed the vegetable mixture from the skillet, wiped it out, and sauteed the squid just for a few seconds. Once the squid had cooked, I added the squash mixture back to the skillet. The entire mixture was stirred well and seasoned with salt and pepper.

Squid and vegetable mixture

In the meantime I cooked both the spinach and roasted red pepper fettuccine and tossed it into the squid-vegetable mixture. Then it was time to plate...

Fettuccine with Calamari and Summer Squash

The one thing about this dish was that it was visually stimulating. The colors were absolutely beautiful. Heck I would even say my picture rivals the one in JW's book. And...it tasted just as good as it looked. I'm going to have to give some credit to the amazing produce I bought at the farmers market the day before. I honestly think that was the reason why the dish actually tasted like summer. Nonetheless, it was amazing how the ingredients went together so well. The crunch of the zucchini and squash, the sweetness of the onions and corn, and finally the pasta - yummy! My own critique would be that the recipe definitely made more than "4 main-course servings." But I just ended up with some leftovers and I wasn't complaining. Overall, it was an incredibly good dish and I would definitely make it again!

Enjoy!

I would like to thank Jill Harvey with all the help julienning that squash and zucchini!

Sunday, August 7, 2011

Sea Scallop Fettuccine

Recipe: Sea Scallop Fettuccine
Page: 130
Date Cooked: August 1, 2011

Soon after I hand-rolled the lasagna sheets for the "lasagna with smoked ham and cabbage", I fell in love with the taste of home-made pasta and decided I needed to buy a pasta maker. It tasted so good but I couldn't see myself rolling it out with a pin every time. It arrived and life took over, so it sat in the box for a while. However, I finally took it out and it's inaugural pasta came from a JW recipe and here it is.

Eggs, all-purpose flour, salt, sea scallops, shallot, lemon, parsley, white wine, heavy cream, olive oil, and pepper

I began with the pasta making. In a food processor I combined the egg yolks, flour, and salt; and pulsed till a ball of dough formed. I then kneaded it for a few minutes and then covered it with plastic wrap to rest for a bit.

Pasta dough in the process

I divided the pasta dough into 3 pieces and worked with one at time. I rolled the dough through the pasta maker using one setting at a time until the next-to-thinnest setting. All the sheets were dusted with flour and allowed to dry on the counter. Once the sheets dried, I ran them through the fettuccine cutter. The fettuccine was then tossed with some flour and left out to dry.

1. Rolling out pasta dough 2. Pasta sheets 3. Fettuccine

I then put a sliced shallot, parsley, and wine into a saucepan and allowed it to simmer for some time. JW recommends placing the tough muscle from the scallop into this mixture as well. Unfortunately, my grocery store doesn't carry scallops with the muscle on, so I went without it. I strained the liquid, returned it the saucepan, and let it reduce. I then added the heavy cream and allowed the sauce to simmer until it thickened. Once ready, it was removed from the heat.

Left: reducing the wine mixture Right: cream sauce

With the pasta and sauce out of the way, I focused on cooking the scallops. I rubbed the scallops with olive oil, salt, and pepper and then heated them in a large skillet to get a sear on each side. I made sure to follow JW's warning in the shellfish section of this book as well - "It's a crime to mess around too much with scallops."

Searing the scallops

I removed the scallops from the skillet and placed them on a plate. I poured the cream sauce into the skillet and kept it warm. During this time, I cooked the pasta until just tender. I then placed the drained pasta into the skillet with the cream sauce.

1. Heavy cream sauce 2. Boiling pasta 3. Pasta with heavy cream

I tossed the pasta into the cream sauce and seasoned it with the lemon juice, salt, and pepper. I then proceeded to plate the pasta and added the scallops on top.

Sea Scallop Fettuccine

I cannot say enough about this recipe. It was delicious. Everything was spot on perfect. The pasta recipe was exactly right and it tasted wonderful. Quite possibly some of the best pasta I have ever had (not to talk myself up too much). The sauce was super yummy. The lemon in the pasta complimented the scallops. Everything about this dish was marvelous. Pure deliciousness! Perhaps it is too soon to rave about the pasta recipes in "A Great American Cook" but I'm well on my way there.

Enjoy!

Tuesday, August 2, 2011

Soft-Shell Crab and Aioli Sandwich

Recipe: Soft-Shell Crab and Aioli Sandwich
Page: 102
Date Cooked: July 29, 2011

Jonathan Waxman opens up this recipe recollecting his first crab po' boy - french roll, spicy mayo, and deep-fried crab. This recipe was his spin on that sandwich but with a few modifications - roll, aioli, and roasted soft-shell crab. Considering the last JW soft-shell crab recipe I made was such a success, I was excited to see what he had in store for this one.

Ingredients: Soft-shell crabs, orange, garlic, olive oil, white wine, paprika, egg yolks, salt, and rolls

The first step was to create the marinade for the crabs. I combined the orange juice, olive oil, white wine, minced garlic, and paprika into a bowl. I then tossed the crabs in the marinade and placed them in the fridge.

Soft-shell crabs in the marinade

While the crabs marinated, I decided to attack the aioli. I pureed the egg yolks and garlic, added the salt, and then dribbled in the olive oil until the sauce began to emulsify. I have been struggling through a number of recipes to perfect my mayonnaise and aioli making skills. And though this aioli definitely was not perfect, I can see that it is getting there.

Aioli

With the oven pre-heated, I placed the crabs on a baking sheet and they roasted until golden brown and cooked through.

Roasting soft-shell crabs and turning once

Once the crabs were roasted, I cut them into pieces, tossed them in the aioli, and placed them on the buns.

Soft-shell crab and aioli sandwich

So I have to say I was a tad bit disappointed with the sandwich. The soft-shell crab itself was amazing and tasted delicious roasted. But the sandwich fell flat. It needed another flavor dimension or texture. I think the recipe was on the right track but it just didn't do it for me.

Enjoy!